Some people doomscroll social media for their dopamine hits, I doomscroll AliExpress. My latest AliExpress doomscrolling session resulted in purchasing this:
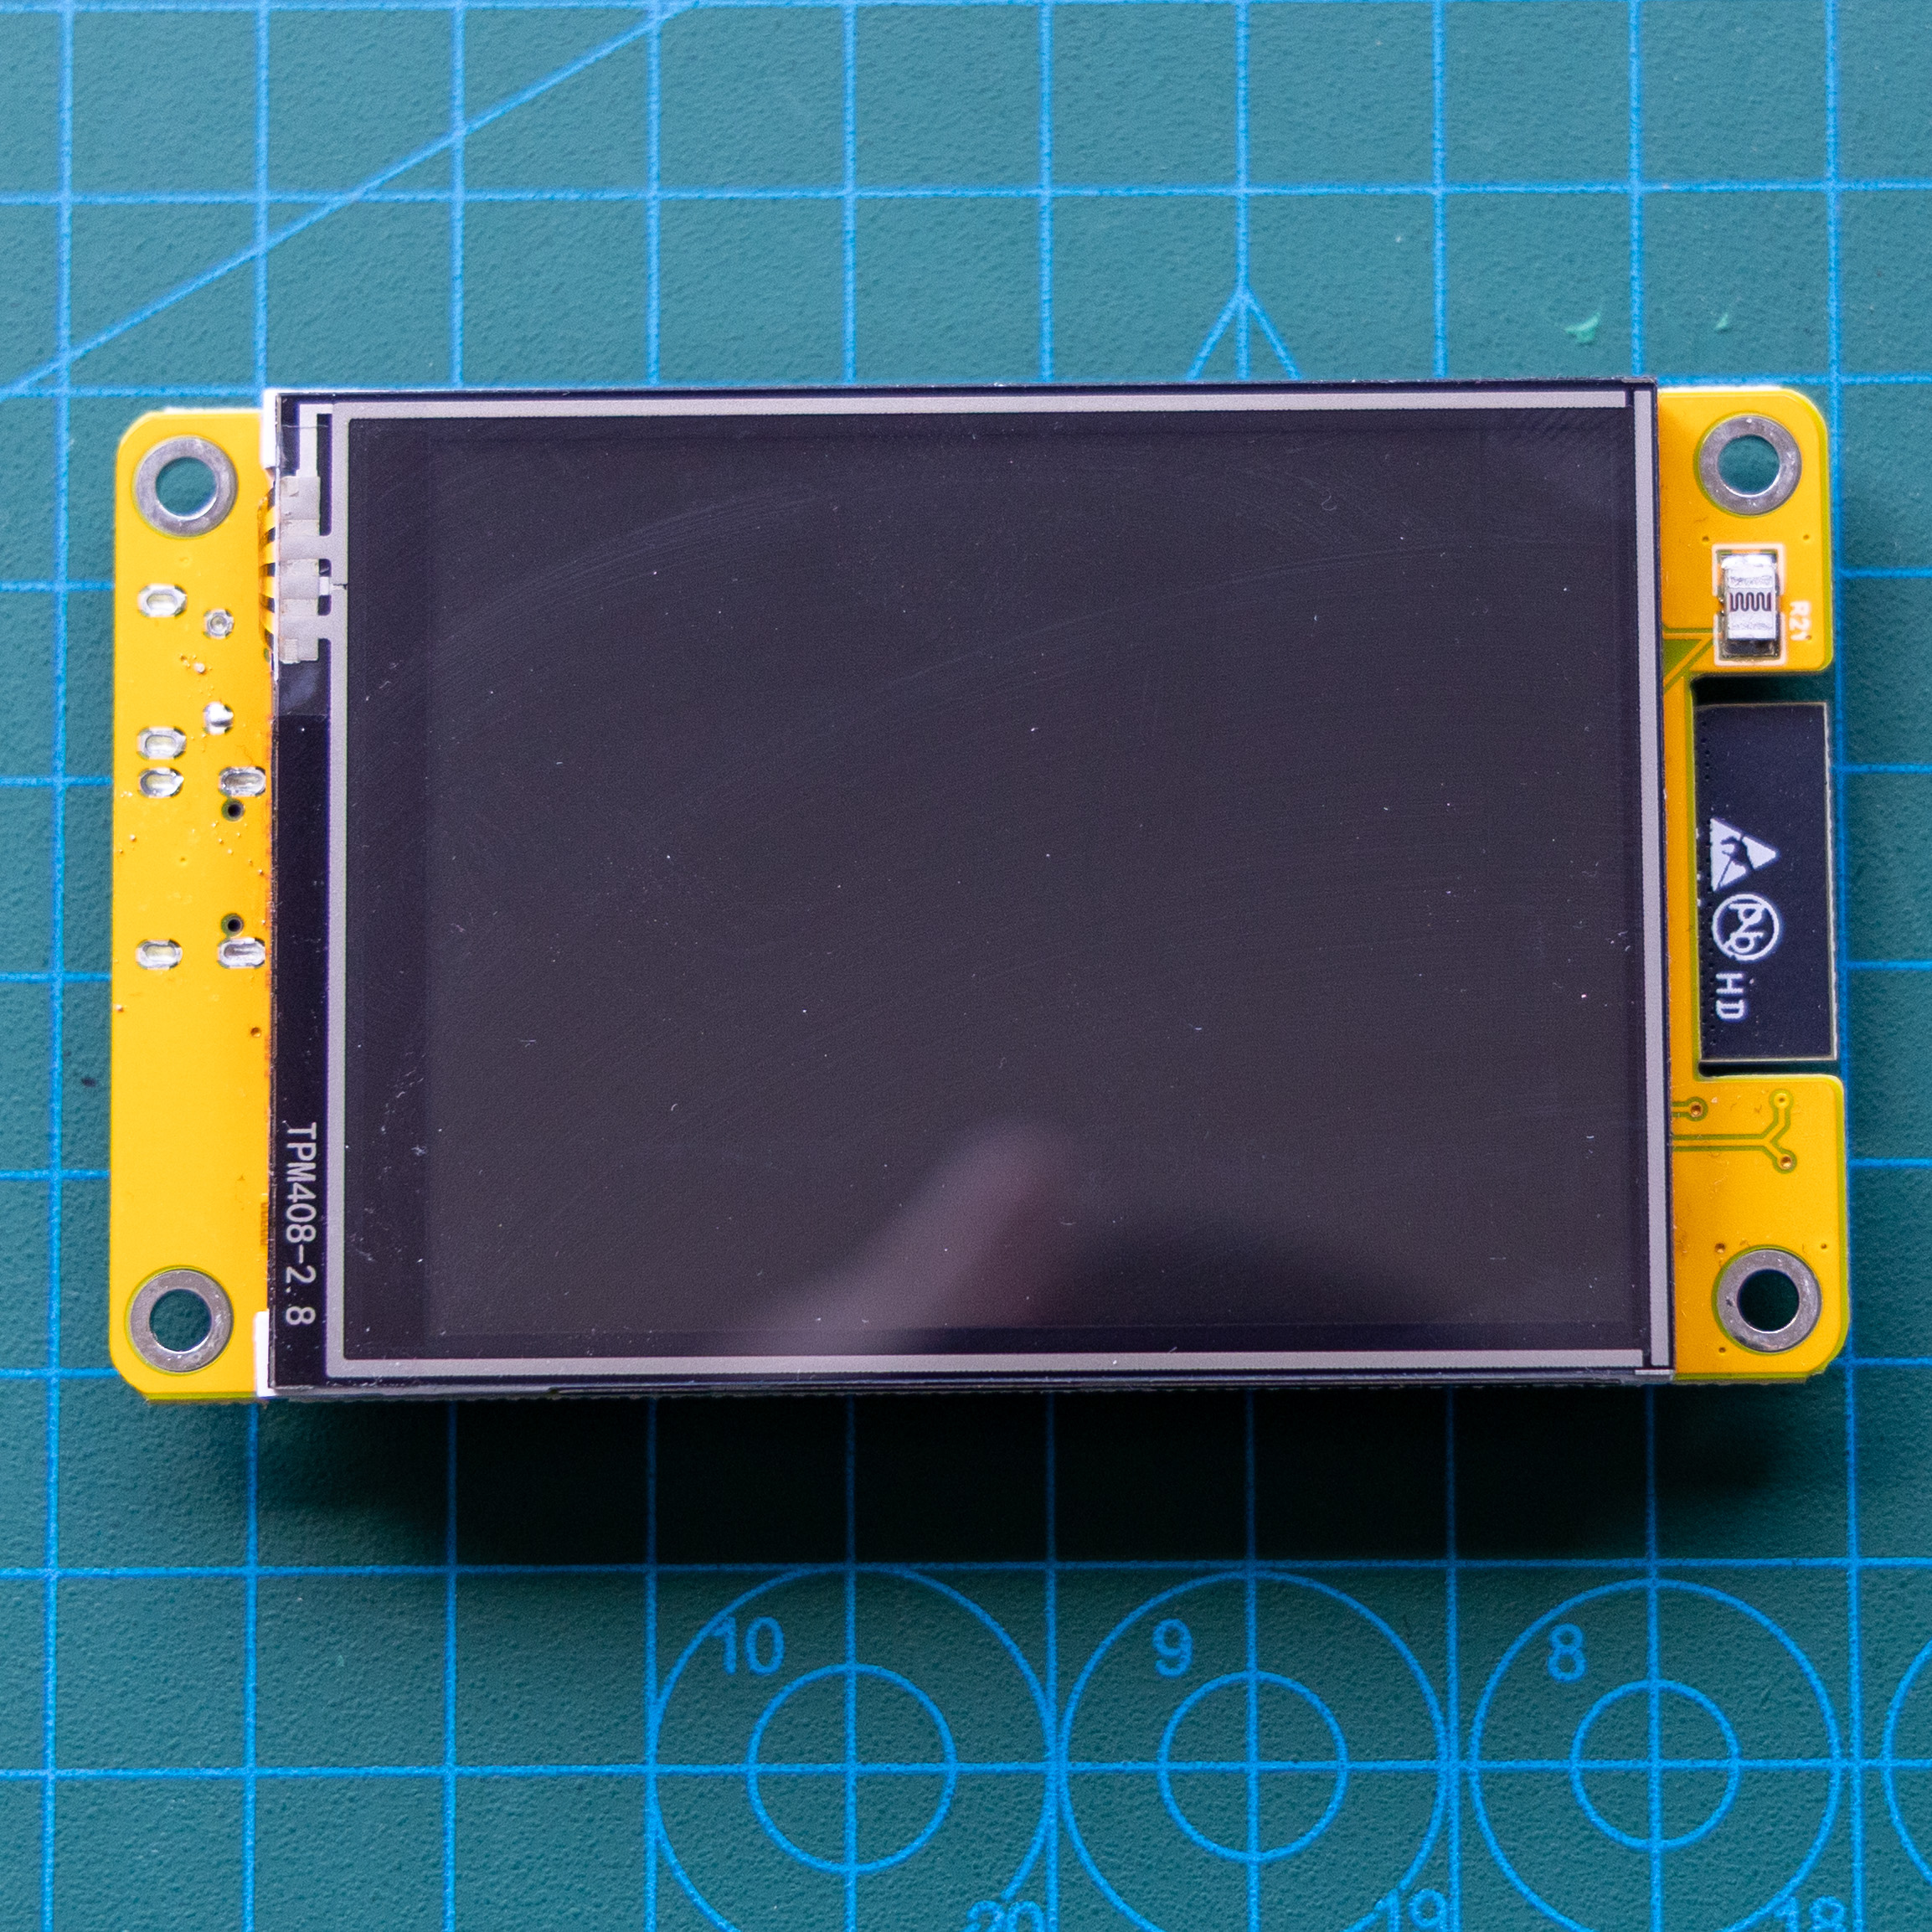
The classic ESP32 240MHz microcontroller featuring 320KB of RAM and 4MB of flash, pre-packaged with a 320x240 resistive 2.8" touchscreen for between $10-$15 Aussie bucks. It's not the fastest or best quality microcontroller or touchscreen but it works and if you only need something basic the value for money here is amazing.
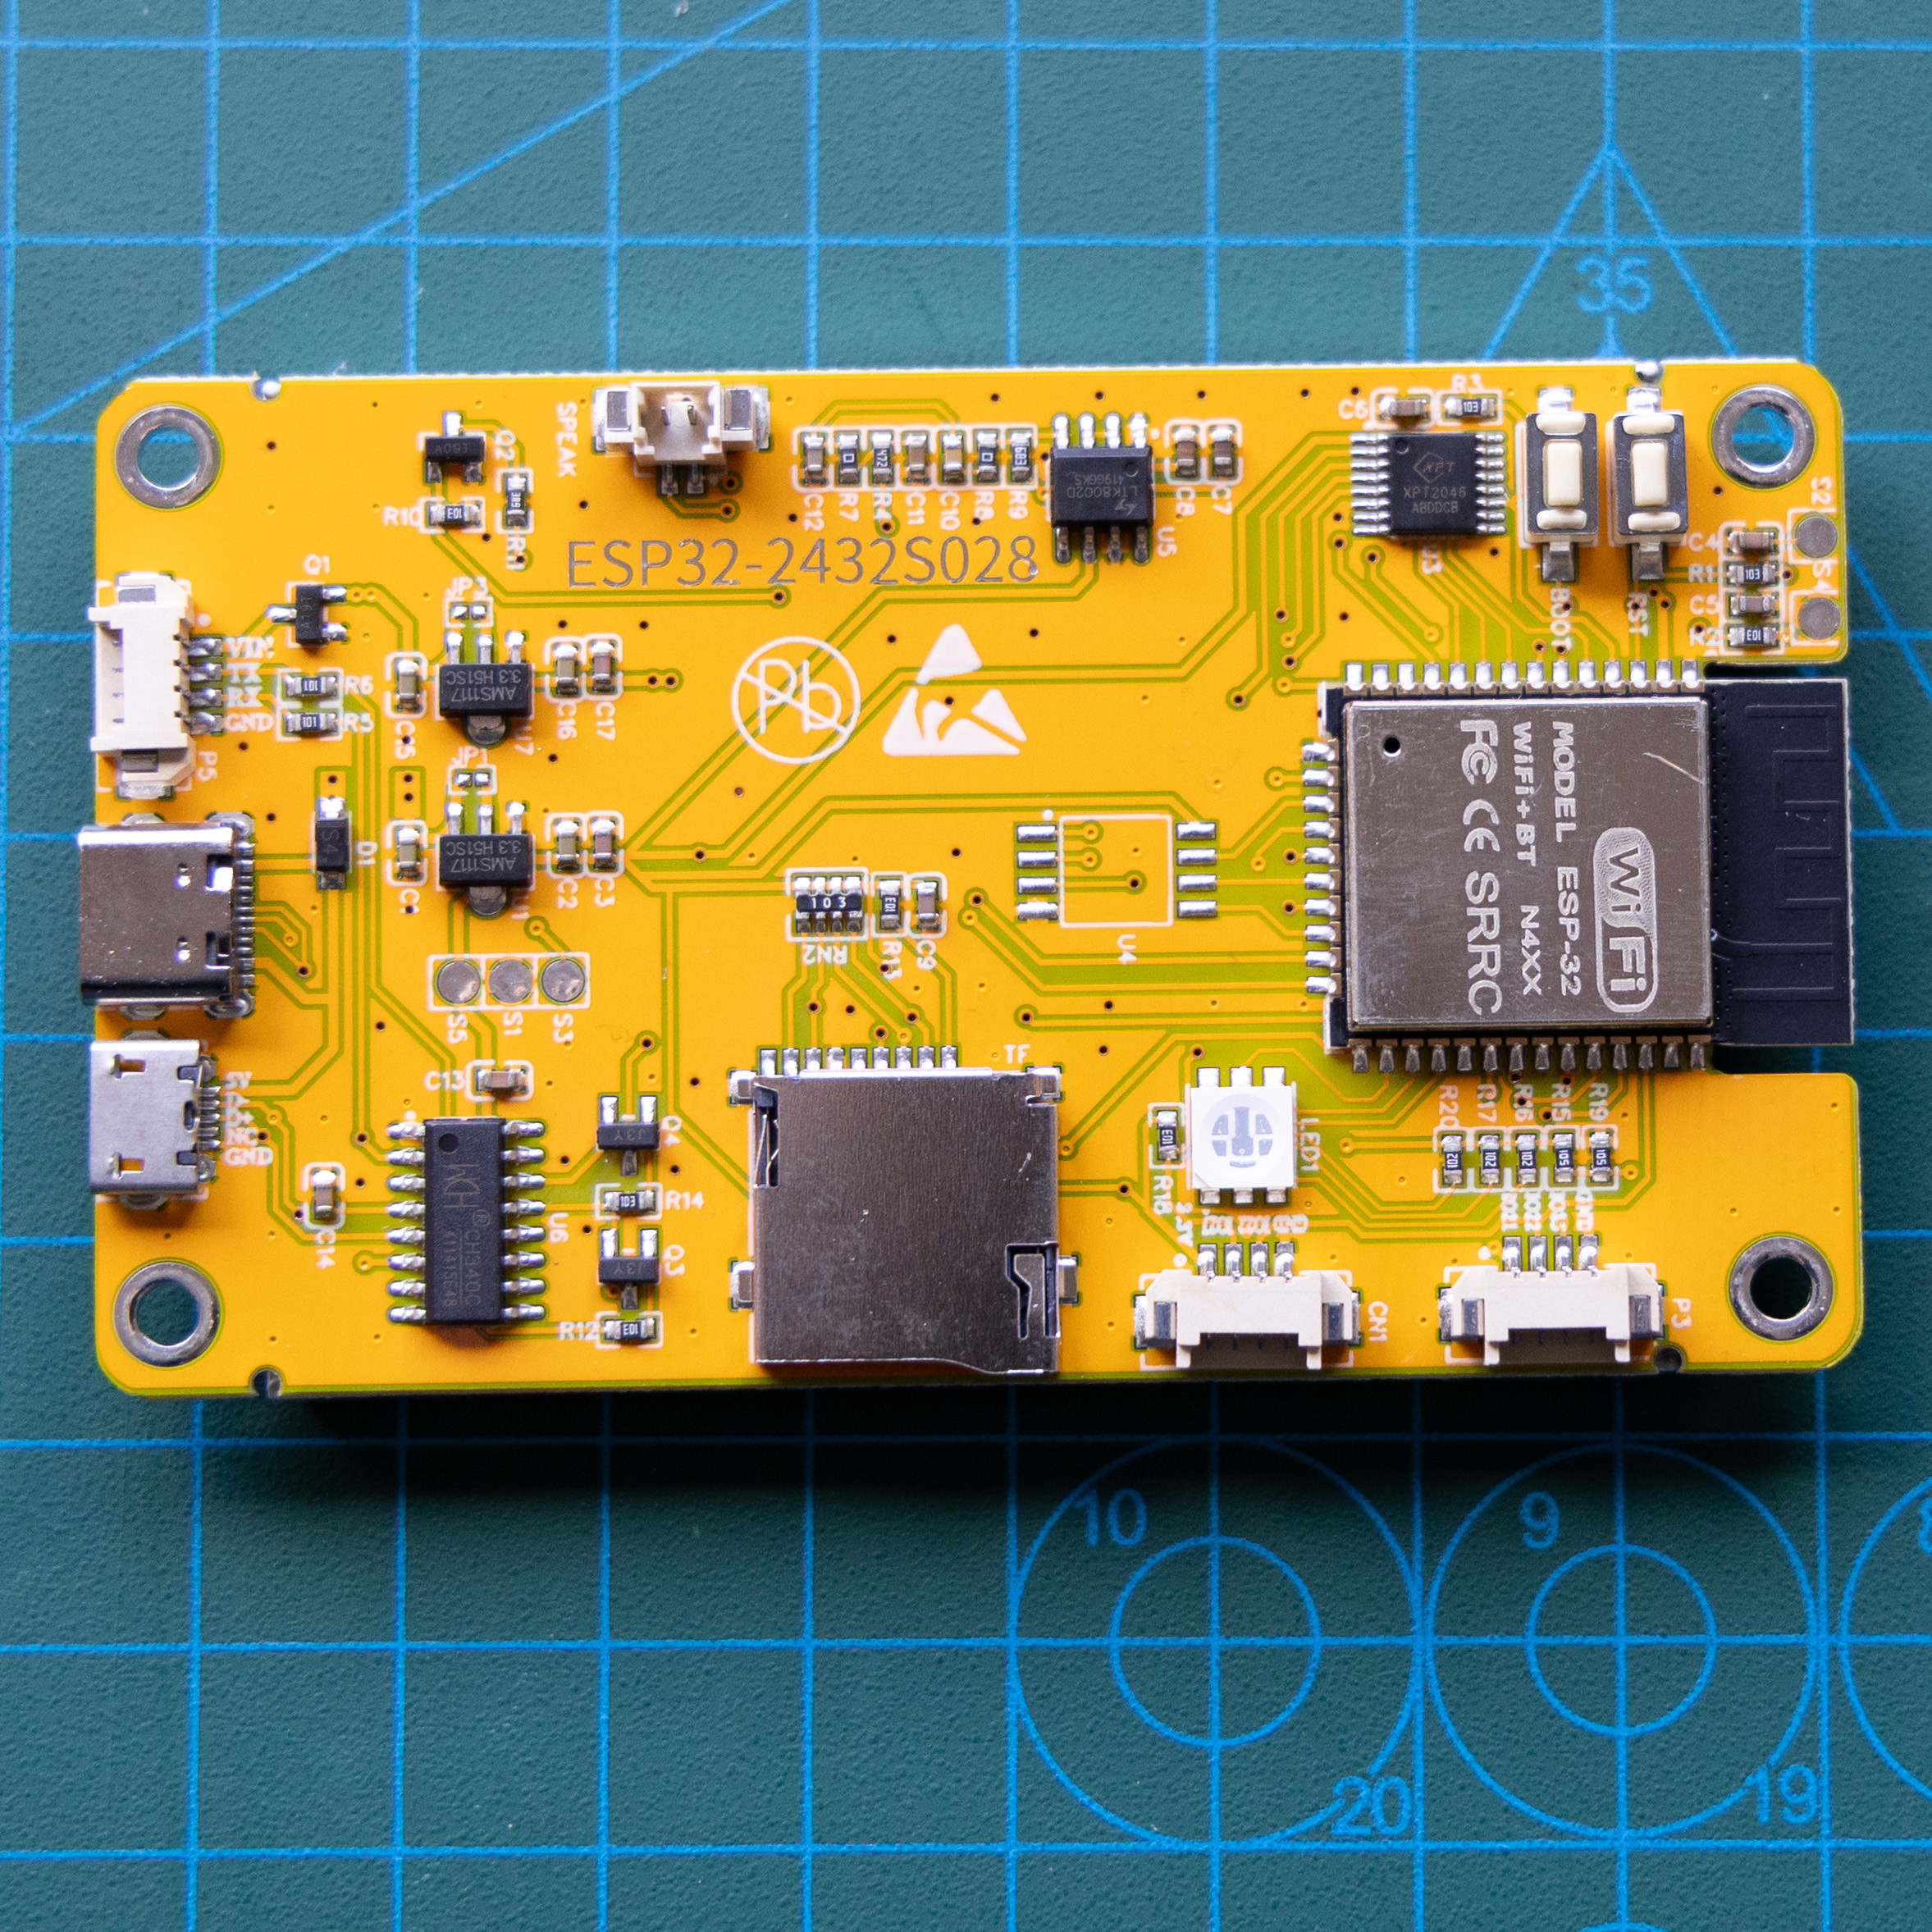
The variant I have is the ESP32-2432S028 but there's a bunch of very similar units sold by various vendors that contain whatever components they have lying around - e.g: slightly different display controllers or a mildly different ESP32 variant. Nerds have called this genre of computer a "Cheap Yellow Display" or CYD for short.
To buy one, search AliExpress with words like "ESP32 LVGL board" you'll see them pop up from multiple sellers. They're usually the best value when purchased as part of a "Bundle Deal" where you get the board and two other items to complete the bundle. Right now I can get 3x of these boards shipped to Australia for only $26 all up.
Fr4nkFletcher ported the popular ESP32-Marauder firmware to the CYD (a set of wi-fi hacking/diagnostic/investigation tools) and witnessmenow published GitHub repo with some demos and documentation like pinouts about these little things.
If you're into Home Assistant stuff, you're probably familiar with ESPHome. It's a wonderful framework that integrates the ESP32 and its associated devices into your Home Assistant setup. ESPHome is basically an operating system for the ESP32 that you can then control via YAML scripts via Home Assistant. The CYD has an ESP32 and I love Home Assistant, so that's what I chose as the first project to try and use my new $10 computer.
Unfortunately, the ESPHome demos witnessmenow has on their GitHub are a bit out of date and didn't mirror my experiences trying to get it set up. There's also a bit of assumed knowledge regarding ESPHome and the ESP32 in general that I didn't have. If you're a total noob like me who saw the CYD on AliExpress and got one without any research, this post is for you. It'll get you up and running so you can muck around with the CYD.
First step is to put ESPHome on the CYD. Follow the instructions on the ESPHome website and follow the ESPHome Device Builder. It's all done in the browser via USB which is cool. The only catch with the CYD is that you need to hold down the Boot button on the back once the "connecting" spinner pops up to actually start the process.
Once you've got ESPHome running and added to your Home Assistant setup the fun begins. I'm gonna assume you're already familiar with YAML. If not, well, strap yourself in and start throwing shit at the wall like I did!
Below is what I've conjured up as the bare minimum ESPHome YAML config in order to show something on the screen of the CYD. I am far from an expert. This is just what I've cobbled together and achieved some results with. If anyone has further input or refinements, please get in touch! My contact details are at the bottom of the page.
esphome:
  name: cyd
⇑ This bit just identifies the device in ESPHome/HA and is automatically generated by default. Can add a little comment, the area the device is in and so on. ESPHome's docs explains more about what you can do here.
esp32:
  board: esp32dev
⇑ You gotta tell ESPHome what type of device you have and we have an ESP32 so that's what we put here. The default framework (the APIs used to translate your script from YAML to the ESP32's native language) is arduino, but you can use esp-idf instead if you like. I'm unsure of the difference exactly but when I tried out esp-idf, I got a bunch of wi-fi errors in the logs and it takes way longer to compile than arduino, so I just left it on the default. More info about this in the ESPHome docs.
logger:⇑ How much detail do ya want in the logs? By default all DEBUG classes messages are displayed. The different levels of logs are, you guessed it, in ESPHome's documentation for the logger component. By the way, if you just leave a bunch of settings blank, ESPHome inserts the default values for you. Thanks ESPHome.
api:⇑ This is the Native API component and "is used to communicate with clients directly, with a highly-optimized network protocol". Gotta have this bit in there so your Home Assistant server can see and interact with the ESP32. More info on what you can do here, including running Home Assistant actions, are in the ESPHome docs.
ota:
  - platform: esphome
⇑ We need this bit here so we can update the code on the CYD over wi-fi. You can remove it but then you'll have to plug it in to a computer to update.
wifi:
  ssid: "xxxx"
  password: "xxxx"
Should be self-explanatory. Adds the CYD to our wi-fi network. By the way, if you want to know what any of this stuff does or the options you can pass to a YAML component, the ESPHome documentation is quite good!
output:
  - platform: ledc
    pin: GPIO21
    id: backlight_pwm
The first bit of non-default stuff! This section sets up the LCD's backlight. Without it, the display looks blank. I just copied and pasted it from witnessmenow's GitHub examples and it worked.
light:
- platform: monochromatic
output: backlight_pwm
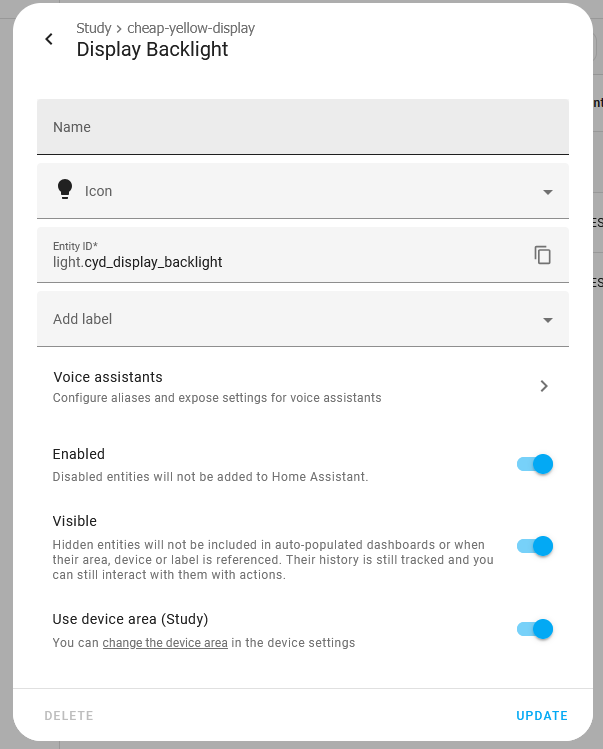
name: Display Backlight
id: backlight
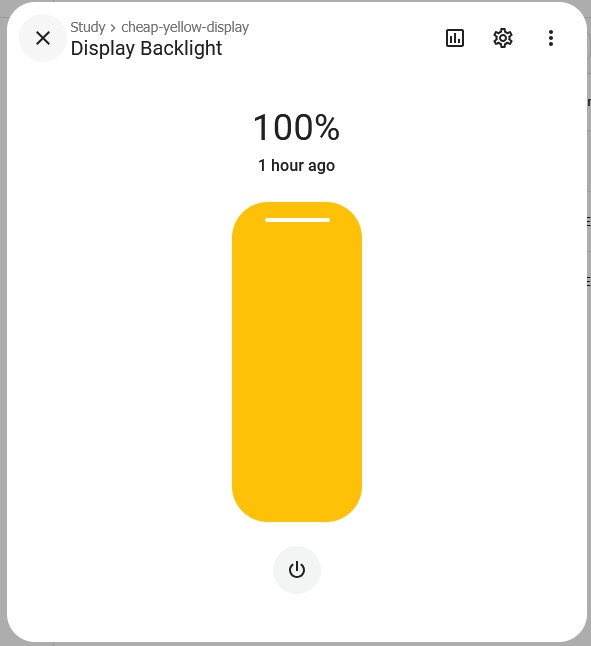
restore_mode: ALWAYS_ONThis works with the previous section to actually control the backlight. It'll appear in Home Assistant as a light and can be set at different brightness levels. Could even pair it with a human presence sensor so it turns off when there's nobody in the room. This is what it looks like in HA:
spi:
  - id: tft
    clk_pin: GPIO14
    mosi_pin: GPIO13
    miso_pin: GPIO12
These are the settings that correspond with how the ESP32 talks to the display controller over the SPI bus (SPI is a common communication protocol on microcontrollers instead of a full serial port with UART and stuff, which might be familiar to most PC enthusiasts). I also copied it from witnessmenow's GitHub examples and it worked.
display:
- platform: ili9xxx
model: ILI9341
spi_id: tft
cs_pin: GPIO15
dc_pin: GPIO2
invert_colors: false
color_palette: 8BIT
auto_clear_enabled: true
rotation: 0
dimensions:
width: 320
height: 240
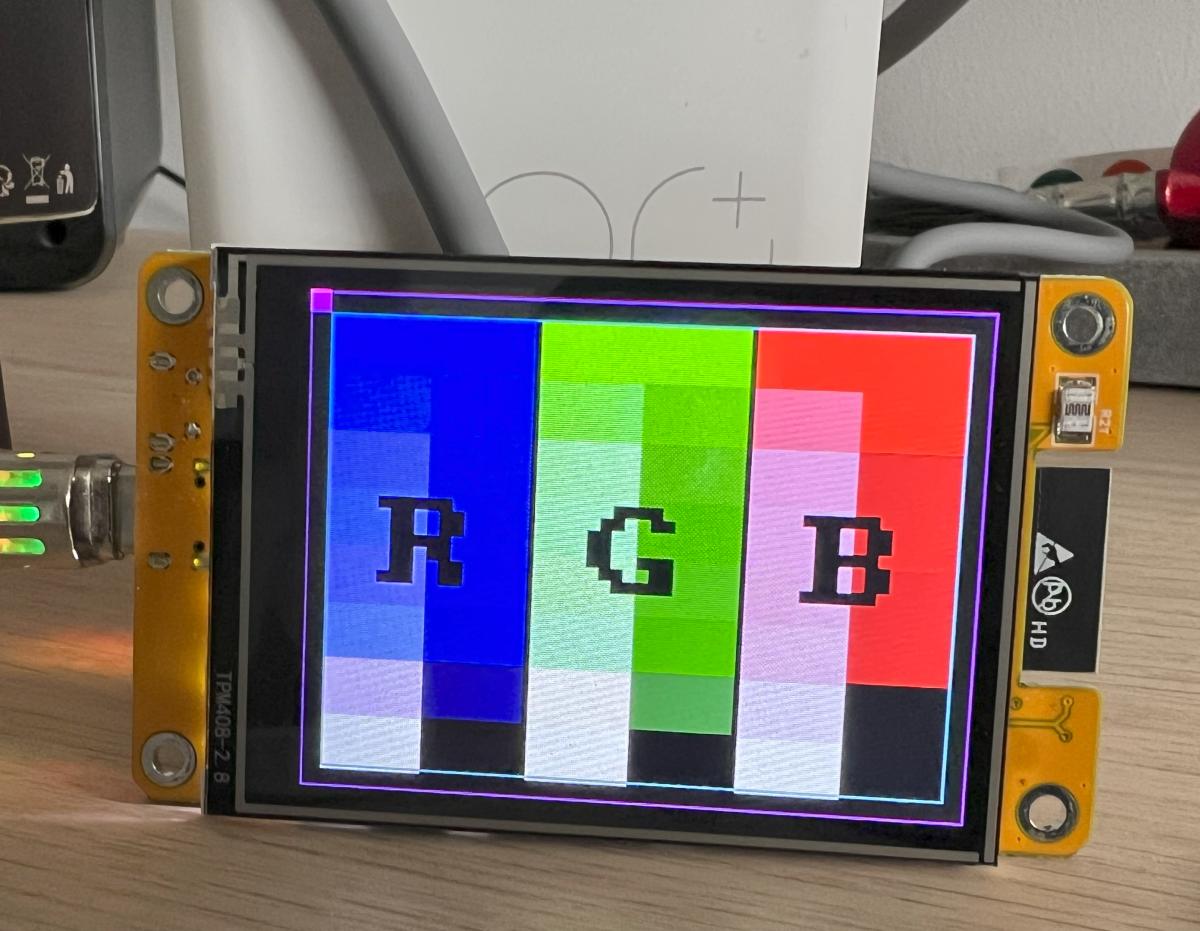
show_test_card: trueHere we set up the screen. ESPHome's documentation on the ILI9xxx display driver is useful to check out. The important bits are color_palette & invert_colors. invert_colors is mandatory, and is not outlined in witnessmenow's GitHub examples as it's a recent thing in ESPHome. We have it set to false as we do not need to invert the colours. color_palette: 8BIT is also needed as if we leave it out, it goes to the default setting, which is 16-bit and our little ESP32 doesn't have enough RAM for that.
auto_clear_enabled: true is here so that the display is cleared before it is updated. Don't always need it as it's on by default when there's something besides the test card. The rotation setting lets you spin the screen around. It's 0 by default but I define it here deliberately as it can often be stuck on the previous rotation if you've been messing around. Same with the dimension settings. It should get it by default from whatever is set in the model: ILI9341 definition, but I put it in there just to make sure it stays that way as when I've experimented with it the display sometimes gets stuck the wrong way around.
show_test_card unsurprisingly, shows a test card image:
 And there you have it - the bare minimum you need to display something up on the screen. Here's the full YAML you can copy and paste into the ESPHome Builder:
esphome:
  name: cyd

esp32:
  board: esp32dev

logger:

api:

ota:
  - platform: esphome

wifi:
  ssid: "xxxx"
  password: "xxxx"

output:
  - platform: ledc
    pin: GPIO21
    id: backlight_pwm

light:
  - platform: monochromatic
    output: backlight_pwm
    name: Display Backlight
    id: backlight
    restore_mode: ALWAYS_ON

spi:
  - id: tft
    clk_pin: GPIO14
    mosi_pin: GPIO13
    miso_pin: GPIO12

display:
  - platform: ili9xxx
    model: ILI9341
    spi_id: tft
    cs_pin: GPIO15
    dc_pin: GPIO2
    auto_clear_enabled: true
    invert_colors: false
    color_palette: 8BIT
    show_test_card: true
    rotation: 0
    dimensions:
      width: 320
      height: 240
That's cool and all, but how about do something more useful than a test pattern like text and try out the touch capabilities? Let's borrow once again from witnessmenow's GitHub examples!
On our first use of the touch screen we need to calibrate it. It's a pain in the arse but you only need to do it once. Instructions are in the ESPHome docs and explain why it needs to be done with the XPT2046 controller the CYD employs, but I'll guide you through it.
Upload all this YAML to your CYD:
esphome:
  name: cyd

esp32:
  board: esp32dev

logger:

api:

ota:
  - platform: esphome

wifi:
  ssid: "xxxx"
  password: "xxxx"

output:
  - platform: ledc
    pin: GPIO21
    id: backlight_pwm

light:
  - platform: monochromatic
    output: backlight_pwm
    name: Display Backlight
    id: backlight
    restore_mode: ALWAYS_ON

spi:
  - id: tft
    clk_pin: GPIO14
    mosi_pin: GPIO13
    miso_pin: GPIO12
  - id: touch
    clk_pin: GPIO25
    mosi_pin: GPIO32
    miso_pin: GPIO39

display:
  - platform: ili9xxx
    model: ILI9341
    spi_id: tft
    cs_pin: GPIO15
    dc_pin: GPIO2
    auto_clear_enabled: true
    invert_colors: false
    color_palette: 8BIT
    show_test_card: true
    rotation: 0
    dimensions:
      width: 320
      height: 240

touchscreen:
  platform: xpt2046
  id: my_touchscreen
  spi_id: touch
  cs_pin: GPIO33
  interrupt_pin: GPIO36
  calibration:
    x_min: 0
    x_max: 280
    y_min: 340
    y_max: 3860
  transform:
    swap_xy: true
  on_touch:
  - lambda: |-
      ESP_LOGI("cal", "x=%d, y=%d, x_raw=%d, y_raw=%d",
          touch.x,
          touch.y,
          touch.x_raw,
          touch.y_raw
      );
I'm not gonna go into detail now about the new stuff as I'll explain it better later, but the aim here is to run the stylus around the edges of the screen so that you get real values for the calibration section of the touchscreen component. The XPT2046 controller doesn't know shit from fuck when it comes to where things are on the display so we have to tell it. It's tedious and I think a more expensive touch screen would already be calibrated so you can just tell it to use the pixels, but here we are.
The screen should still have the test image on it, but if you run the stylus over the screen you'll be able to see in the logs on your computer that the numbers are changing.
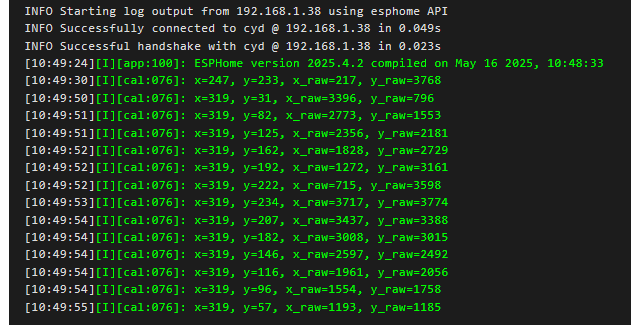
Pop the stylus in each corner as close as you can and you'll end up with data like this for each of the 4 touches.
[10:50:48][I][cal:076]: x=319, y=238, x_raw=3823, y_raw=3835
[10:50:51][I][cal:076]: x=237, y=232, x_raw=208, y_raw=3748
[10:50:52][I][cal:076]: x=319, y=0, x_raw=3798, y_raw=288
[10:50:55][I][cal:076]: x=257, y=0, x_raw=225, y_raw=282
From the raw values captured here we can populate the calibration fields in the touchscreen component with real numbers for when we actually want to use the touchscreen:
calibration:
  x_min: 208
  x_max: 3823
  y_min: 282
  y_max: 3835
Yours will be different than this so don't just copy and paste it hoping it'll work (it might? But perhaps not very well). I don't even know if this is the correct way to do it. I'm just fumbling around here to get something that works for my rudimentary needs. The ESPHome documentation on touchscreen calibration goes into more detail.
Now that we've calibrated the touchscreen we can try and do something useful. This demo simply displays the text Hello World and when you tap anywhere on the screen it changes the text from Hello World to Goodbye World and when you tap it again, it goes back to Hello World.
Here's the entire YAML:
esphome:
  name: cyd

esp32:
  board: esp32dev

logger:

api:

ota:
  - platform: esphome

wifi:
  ssid: "xxxx"
  password: "xxxx"

font:
  - file:
      type: gfonts
      family: Roboto
    id: roboto_large
    size: 40
    bpp: 4

globals:
  - id: display_hello
    type: bool
    initial_value: 'true'

output:
  - platform: ledc
    pin: GPIO21
    id: backlight_pwm

light:
  - platform: monochromatic
    output: backlight_pwm
    name: Display Backlight
    id: backlight
    restore_mode: ALWAYS_ON

spi:
  - id: tft
    clk_pin: GPIO14
    mosi_pin: GPIO13
    miso_pin: GPIO12
  - id: touch
    clk_pin: GPIO25
    mosi_pin: GPIO32
    miso_pin: GPIO39

display:
  - platform: ili9xxx
    model: ILI9341
    spi_id: tft
    cs_pin: GPIO15
    dc_pin: GPIO2
    auto_clear_enabled: true
    invert_colors: false
    color_palette: 8BIT
    rotation: 0
    dimensions:
      width: 320
      height: 240
    lambda: |-
      auto font = id(roboto_large);
      const char* text;

      if (id(display_hello)) {
        text = "Hello World!";
      } else {
        text = "Goodbye World!";
      }

      int x1, y1, text_width, text_height;

      it.get_text_bounds(0, 0, text, font, TextAlign::TOP_LEFT, &x1, &y1, &text_width, &text_height);

      int x = (it.get_width() - text_width) / 2;
      int y = (it.get_height() - text_height) / 2;

      it.print(x, y, font, COLOR_WHITE, TextAlign::TOP_LEFT, text);

touchscreen:
  platform: xpt2046
  id: my_touchscreen
  spi_id: touch
  cs_pin: GPIO33
  interrupt_pin: GPIO36
  calibration:
    x_min: 208
    x_max: 3823
    y_min: 282
    y_max: 3835
  transform:
    swap_xy: true
  on_touch:
    lambda: |-
      id(display_hello) = !id(display_hello);
Let's go through the new bits!
font:
  - file:
      type: gfonts
      family: Roboto
    id: roboto_large
    size: 40
    bpp: 4
When we want to write text to the screen in ESPHome we need to tell it which font to use and we do that in the font component. You can pull TTF fonts from your HA server, or simply pull it from Google Fonts when you send the script to the ESP32 using the built-in ESPHome setting for it like I've done here. bpp: 4 is "the bit depth of the rendered font from OpenType/TrueType, for anti-aliasing". By default it is 1 and looks like shit, 4 looks nice I reckon.
globals:
  - id: display_hello
    type: bool
initial_value: 'true'spi:
- id: tft
clk_pin: GPIO14
mosi_pin: GPIO13
miso_pin: GPIO12
- id: touch
clk_pin: GPIO25
mosi_pin: GPIO32
miso_pin: GPIO39lambda: |-
auto font = id(roboto_large);
const char* text;
if (id(display_hello)) {
text = "Hello World!";
} else {
text = "Goodbye World!";
}
int x1, y1, text_width, text_height;
it.get_text_bounds(0, 0, text, font, TextAlign::TOP_LEFT, &x1, &y1, &text_width, &text_height);
int x = (it.get_width() - text_width) / 2;
int y = (it.get_height() - text_height) / 2;
it.print(x, y, font, COLOR_WHITE, TextAlign::TOP_LEFT, text);Lambdas are a section of a component where you can enter C++ code directly and when ESPHome builds the binary for the ESP32, it just passes that along to the compiler. I'm gonna be honest here and tell you that I used an LLM/AI to do this for me. I have an extremely faint idea of what's going on and can hack away at the code at best. But essentially the lambda section of your display component is how you draw stuff on the screen.
touchscreen:
  platform: xpt2046
  id: my_touchscreen
  spi_id: touch
  cs_pin: GPIO33
  interrupt_pin: GPIO36
  calibration:
    x_min: 208
    x_max: 3823
    y_min: 282
    y_max: 3835
  transform:
    swap_xy: true
  on_touch:
    lambda: |-
id(display_hello) = !id(display_hello);The on_touch section is a trigger that, you guessed it, runs when the screen is touched. Doesn't matter where, just any touch triggers whatever goes inside this section. We have a lambda that assigns the opposite value of whatever is currently in the global variable display_hello - because it is a boolean, the opposite of true is false and the opposite of false is true. Nice and simple. The display meanwhile, is set to update whenever that variable changes, which is why the text on the screen changes too whenever we tap the display. Fucken computers, hey? Magic boxes of electrified sand.
Here's a little GIF of the code in action:
So there you have it, a really basic overview of the Cheap Yellow Display and some very basic sample code to get stuff up on the display and using the touchscreen to trigger an action. Happy hacking everyone!
It's an Ausse take on tech news that I write daily. No ads, no tracking, no affiliate links, no AI slop. 100% subscriber-funded since 2015.